유동 항목 목록
기본 설명서
기능: 선택 목록을 다른 트래커로 연결된 데이터에 기반하여 동적으로 갱신함.
사용: trackerId,filterFieldIdThere,filterFieldIdHere,listFieldIdThere,statusThere
설명:
| trackerId | 연결할 트래커의 ID: |
| filterFieldIdThere | is the field you want to link with in that tracker; |
| filterFieldIdHere | is the field you want to link with in the current tracker; |
| listFieldIdThere | is the field ID you wish to pull the selection list from, based on the value selected in fiterFieldIdHere matching field(s) in filterFieldIdThere; |
| statusThere | restricts values appearing in the list to those coming from records in the other tracker that meet specified statuses of [o|p|c] or in combination (op, opc); |
복수의 선택사항이 지정한 순서대로, 쉼표로 분리되어 나타나야 함.
to be tested filterFieldHere can be an item link, a user selector, a group selector, a country selector, a dynamic list
Tutorial
With Tiki's trackers, you can create dynamic forms, in which field options change automatically, depending on other selections.
In this tutorial, you will create a dynamic tracker that users will complete to enter their operating system and version number. Depending on the operating system that they choose (Windows or Solaris), different version options will appear.
You will actually need to build two trackers: an "internal" tracker to hold the dynamic options, and an "external" tracker from which the user will make their selections.
Step 1: Build the "internal" tracker for the selectable options
- Create a new tracker.
In this example, since the selectable options are for an "operating system", we will name the tracker Operating System.
Record the ID number for this tracker. We'll refer to this tracker as the Option Tracker ID.
In this example, the ID is 6.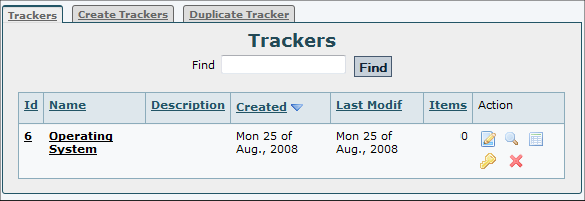
- Create a field with the name OS, of type drop down, with the options Windows,Solaris.
Record the ID number for this field. We'll refer to this field as the Option Tracker Choices ID. In this example, the ID is 8. - Create a field with the name Version of type text for this tracker.
Record the ID number for this field. We'll refer to this field as the Option Tracker Versions ID. In this example, the ID is 9.
Step 2: Populate the "internal" tracker.
Now that you've built the tracker to hold the options, you need to populate the tracker with the valid choices.
- From the Trackers listing page, click the Option Tracker tracker that you just created.
- Click Insert new Item.
- Populate the valid OS versions.
In the OS field, select Windows.
In the Version field, type Vista.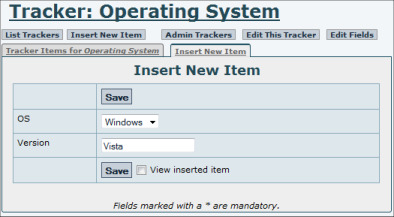
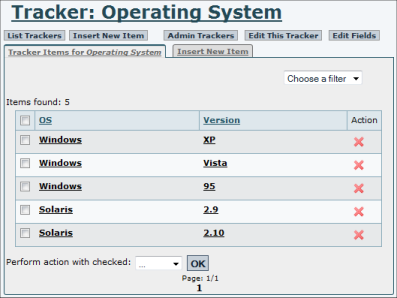
- Repeat these steps to enter all of the valid combinations that to allow (for example: Windows XP, Solaris 2.9, and so on.
Step 3: Create the "external" user tracker
Now you need to create the actual tracker the will contain the selectable options that you defined.
- Create a new tracker.
In this example, we will name the tracker User Profile. - Create a field with the name Operating System, of type item link with the options: Option Tracker ID,Option Tracker Choices ID
You created these IDs in Step 1. In this example, the options are: 6 , 8.
This is the selector from which the users will select their operating system (Windows or Solaris).
Record the ID number for this field. We'll refer to this field as the User OS Choices ID. In this example, the ID is 10. - Create a field with the name Version, of type dynamic items list, with the options: Option Tracker ID,Option Tracker Choices ID,User OS Choices ID,Option Tracker Versions ID
In this example, the options are: 6 , 8 , 10 , 9 . - Create a field with the name Your name, of type text.
This will simply be a field for users to enter their names.
Test the tracker
Now you can test the "user" tracker (named User Profile in this example).
- From the Trackers listing page, click the User Profile tracker that you just created.
- Click Insert new Item.
Notice that the Version field is empty. - In the Operating System field, select Windows.
Notice that the Version field is now populated with the Windows options (Vista, XP, and 95).
- Change the Operating System field to Solaris.
Notice that the Version field is now populated with the Solaris options (2.9 and 2.10).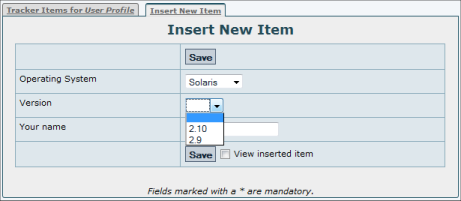
Final notes
- Chained use of the dynamic list item type in trackers does not work at the moment (Tiki5.0Beta1). Vote for the issue if you feel it is important.
- Categories might be an alternative for you.
See also
Backlinks:
No pages link to 유동 항목 목록