배거 관리
배너 전용으로 2개의 관리 페이가 있습니다:
- "관리 > 배너" (tiki-list_banners.php)
여기는 구역(zones)을 만들고, 컨텐츠를 정의하고 사용자에게 할당하고, 시간대를 정의하는 등을 위한 곳입니다....
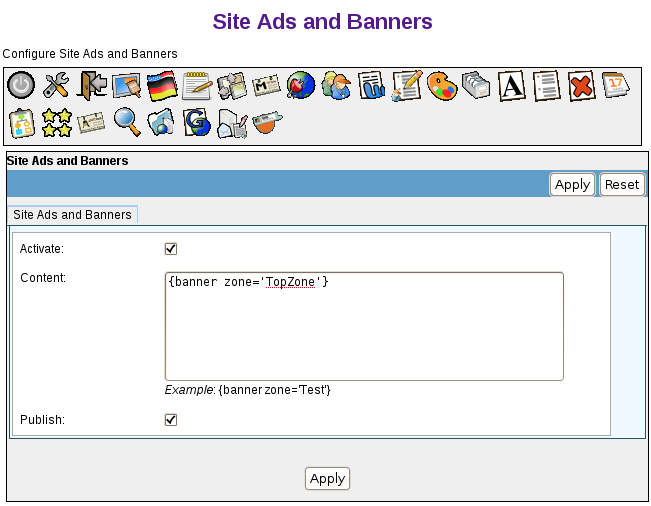
- "관리 > 관리 홈 > 사이트 광고 및 배너" (tiki-admin.php?page=ads)

이름만으로 보면 더 많은 기능을 담고 있을 것 같지만, 현재 이 관리 페이지의 유일한 목적은 사이트 헤더 영역에 배너 구역을 추가하기 위한 것입니다. 배너 위치는 테마에 따라 약간씩 다를 수 있으며, 배너 구역은 사전에 정의되어 있어야만 합니다.
배너 구역
배너 구역 은 지정된 배너를 표기할 정의된 영역입니다. 귀하의 사이트에 대하여 필요한 만큼의 배너를 정의할 수 있습니다, 그리고 각 구역에 다른 배너가 표시되도록 할 수 있습니다. 예를 들면, 일반적인 사이트는 3개의 배너 구역을 가질 수 있을 것입니다:
- 상단 구역, 모든 페이지의 상단에 배너 광고를 표시
- 좌측 혹은 우측 구역, 좌 혹은 우 열에서 광고를 표시
- 하단 구역, 페이지의 하단에서 다른 배너를 표시
배너 구역 만들기
새 배너를 만들기 전에, 배너를 놓게 될 배너 구역을 보유해야만 합니다.
새 배너 구역을 만드려면:
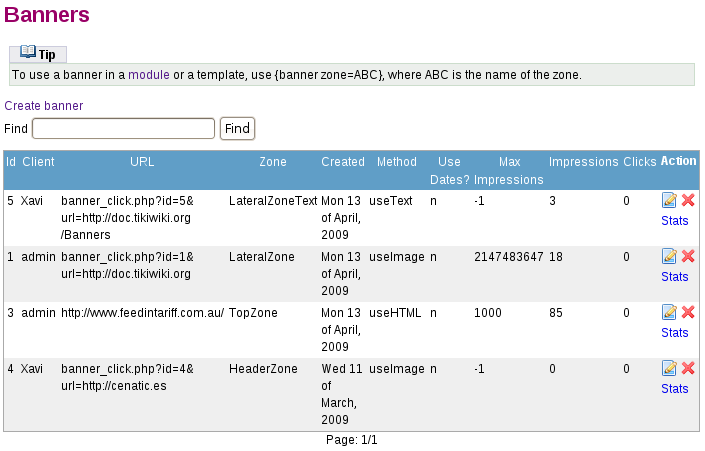
- 관리 메뉴에서 배너를 클릭하십시오. 배너 페이지가 나타나고 현재 배너를 표시합니다.
- 배너 만들기를 클릭하여 새 배너 구역을 만드십시오. ㅂ너 편집 혹은 만들기 페이지가 나타납니다.
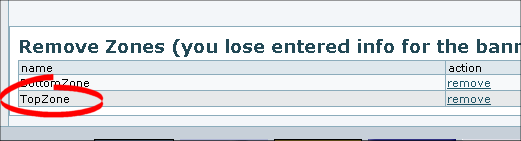
- 구역 만들기 필드에서, 새 배너 구역에 대한 이름을 입력하고 (예를 들면 TopZone) 구역 만들기를 클릭하십시오.
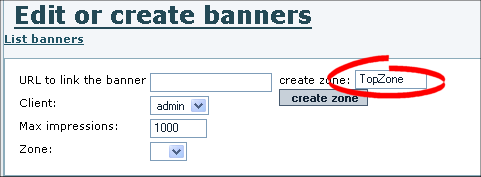
- 티키는 새 배너 구역을 (페이지의 하단에서) 기존의 구역의 목록에 추가합니다.
이제 배너 구역이 있으므로 실제 배너를 만들 준비가 된 것입니다.
배너 유형
티키는 다음의 배너 유형을 만들 수 있습니다:
- HTML — 배너의 완벽한 HTML/XHTML 코드. 예를 들면, 배너 교환에 소속되어 있다면, 배너를 표시할 코드 조각을 수신할 수 있습니다.
주의: HTML의 일부로써 (-+<A HREF...>+-) 링크를 포함하면 배너의 링크할 URL 필드를 재정의할 것입니다. - 그림 — 어떤 이미지든지 (PNG, BMP, 혹은 GIF) 업로드하여 배너로 사용할 수 있습니다.
- 고정된 URL — 호스팅된 위치에서 배너를 연결할 수 있습니다. 예를 들면, 동적 배너를 제공하는 배너 교환에 소속되어 있으면, 사용할 URL을 가지고 있을 수 있습니다 (예를 들면 http://bannerserver/mybanner?id=foo 와 같은).
- 텍스트-- 단순한 텍스트로만 된 광고. 텍스트는 bannertext CSS 스타일을 이용하여 서식적용이 될 것입니다.
배너 만들기
새 배너를 만드려면:
- 관리 메뉴에서 배너를 클릭하십시오. 배너 페이지가 나타나고 현재 배너를 표시합니다.
- 배너 만들기를 클릭하여 새 배너를 만드십시오. 배너 편집 혹은 만들기 페이지가 나타납니다.
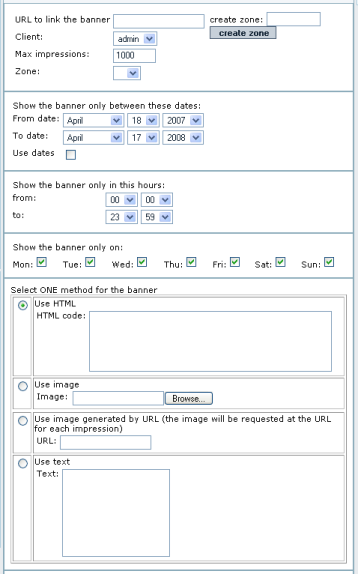
- 다음 표를 사용하여 페이지의 각 필드를 완료하십시오:
필드 설명 배너를 연결할 URL The fully qualified URL click-through for the banner, such as http://www.tikiwiki.org. The URL will open in a new browser window. If blank, the banner will not be clickable.
Notes:
* If you select an HTML banner type, you must include the URL in the HTML code — not in this field.
* To track banner clicks, use:
banner_click.php?id=XX&url=http://www.tikiwiki.org, where XX is the banner ID. The banner ID is shown on the Banners page.
* Leave this blank if an HTML banner uses Javascript from a banner service such as AdSense because that code will make the banner clickable.Client Select a username as the "client" for this banner. Clients can display the stats for a specific banner. Max impressions The maximum number of times the banner will be displayed (default 1000). After reaching this number, the banner will no longer display.
Hint: If your site has lots of traffic, increase this number.Zone Select the zone in which to display the banner. To create a new zone, in the Create Zone field, type a name for the new banner zone and click Create Zone. Show between dates To automatically turn this banner on and off at a specific date, select the Use dates option and then select a From and To date. For example, you can create a banner to display only for a specific holiday or event.
If you do not select the Use dates option, the banner will be shown immediately, and continue to be shown until the Max impressions.Show between hours Select the time of the day that the banner will display. By default, the banner will display 24-hours-a-day. As of April 2009 and in Tiki 2.x sites, you may need to re-set the hours from the default ones, to "from 00:00 until 23:59h" in order to have your banners display properly. Show only on Select the specific days of the week that the banner will display. By default, the banner will appear 7-days-a-week. For example, you can create a banner to display only on weekends. Banners method Select a banner type: HTML, Image, URL, or Text. URIs where the banner appears only Give the list of URIs you want the banner to only appears. The URIs are encliosed with #. Example: #/tiki/my_page#/tiki/tiki-index.php?page=my_page#. This banner will only appear in the page my_page. You can have as many banners of the zone appearing in the same URI. They will share the display. The zone when not in the URIs will display any banner with an empty URI selector. tiki>8.0 - 배너 저장을 클릭하십시오.
이제 배너를 만들었고 구역에 할당을 하였으므로, 표시할 준비가 된 것입니다.
배너 표시
티키에서 배너를 표시하려면, 단순히 다음 코드를 추가하면 됩니다 {banner zone=XXXXX}
(여기서 XXXXX 는 배너 구역의 이름입니다):
- 외형과 느낌 관리 사용자 지정 코드 텍스트 영역에서
이러한 것들은 많이 있습니다, 이들은 페이지의 상단, 수평 메뉴 아래, (3개의 중앙 열 모두에 걸쳐있음), 중앙 열의 상단, 그리고페이지 하단 등을 대상으로 하고 있습니다. - 티키 템플릿 파일 (.tpl) 에서
이는 추천되지 않습니다, 사용자 지정 .tpl 파일을 유지하는데 어려움이 있기 때문입니다. - 모듈에서
위키 페이지 내부에서 PluginBanner 을 사용할 수도 있습니다
예를 들면:
- 모든 페이지으 상단에 배너가 나타나게 하려면, 외형과 느낌 관리 페이지의 사이트 헤더 사용자 지정 코드 텍스트영역에 배너 구역을 추가하거나 "관리 > 관리 홈 > 사이트 관리 및 배너"를 이 페이지의 윗부분에 설명된 대로 사용하십시오.
- 일부 페이지에서 중앙 열의 상단에 배너가 나타나게 하려면, 외형과 느낌 사용자 지정 중앙 열 헤드에 어떤 코드를 다음과 같이 삽입할 수 있습니다:
{if $section eq 'forums' and $smarty.request.forumId eq 2}
{banner zone='forum2'}
{elseif $section eq 'forums' and $smarty.request.forumId eq '6'}
{banner zone='forum6'}
{elseif $section eq 'blogs' and $smarty.request.blogId eq 4}
{banner zone='blog4'}
{* add your elseif *}
{/if}
(외형과 느낌 사용자 지정 중앙 열 헤드 텍스트영역이 없는 오랜 버전의 티키에서는, 음영 레이어 기능을 활성화하고 코드를 적절한 음영 레이어 div에 놓아둘 수 있습니다. 그 기능이 없는 티키의 더 오래된 버전을 보유하고 있는 경우, 업그레이드하십시오 (그렇지않다면, .tpl 파일 편집을 통하여 코드가 추가되어야합니다, 또한 {literal} 태그로 그 내용을 에워싸는 것을 잊지 마십시오).
- 배너가 좌 혹은 우 열에서 나타나게 하려면:
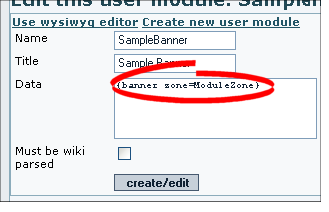
- 새 모듈을 만드십시오.
- 모듈에 배너 구역을 추가하십시오.
티키 1.10 이상 버전에서는, 특정 창 안에서 링크를 열 수 있도록 부가 매개변수 대상이 있습니다. 기본으로 배너 클릭은 새 창을 엽니다. 배너를 같은 창에서 열고 싶은 경우, target=_self (대상=_자신) 을 사용하십시오. target 에 대하여 가능한 값을 확인하십시오
- 모듈 할당하기
1.10 이상 버전의 티키에서는 배너가 동일한 창에 열릴 것인지 새 창에 열릴 것인지를 지정할 수 있습니다. 기본은 새 창에서 여는 것입니다
{banner zone=TopZone target=_self}
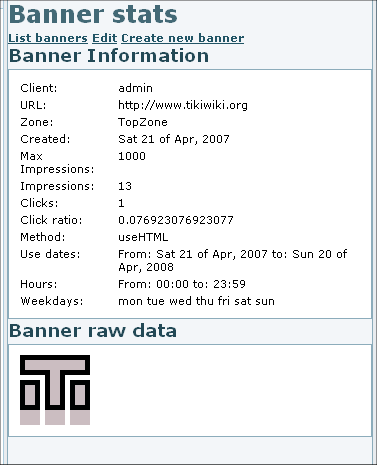
배너 통계 표시
배너가 귀하의 사이트에서 활성화되고나면, 귀하 혹은 고객이 통계를 검토할 수 있습니다.
새 배너 구역을 만드려면:
- 관리 메뉴에서 배너를 클릭하십시오. 배너 페이지가 나타나고 현재 배너를 표시합니다.

- 검토할 배너에 대한 통계 를 클릭하십시오. 배너 통계 페이지가 나타납니다.