Windows Local Install EasyPhp
This is a section of Windows Desktop Install.
TikiWiki relies on three major external applications to run.
- PHP (scripting language)
- Web server (usually Apache)
- Database (usually MySQL)
These three applications are needed to run Tiki. The nice folks at EasyPHP have bundled these three plus phpMyAdmin (to administer your database via a browser)
Once these applications installed, a Tiki database must be created and a Tiki mysql user must be created with appropriate priviledges.
These instructions are designed to be used as a step-by-step guide. You can print them out and/or just keep this browser window open.
They explain how to install EasyPHP (which provides in a quick way PHP, Apache, MySQL and more) and then setup Tiki. They were tested on:
- Windows XP machine with EasyPHP 1.7 and TikiWiki 1.8
- Windows 2000 machine with EasyPHP 1.6 and TikiWiki 1.7.1.1.
- Windows XP SP3 with EasyPHP 5.3.0 & Tikiwiki 2.2
They should work with few differences on similar environments.
Requirements:
- A Windows PC with a .zip decompression utility. Windows XP, Windows 2000, Windows ME, Windows 98, Windows95?? (please confirm anyone?)
- 20 minutes (excluding download time for about 30 MB)
- A decompression utility, as 7-Zip (see Useful Links section at bottom of this page).
- Disk space: 60 Megs {Keep in mind you will have Tiki + EasyPHP (PHP + Apache + MySQL + PhpMyAdmin)}
Step 1: Download EasyPHP and TikiWiki
See the links at the bottom of this page. For TikiWiki, you can choose between different compression formats, you most probably want the .zip, or the .7z if you have 7-Zip.
Step 2: Setup EasyPHP
- After the file has downloaded, double-clicking the easyPHP file setup file.

- Select your interface language.
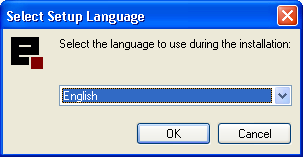
Note: Be sure to specify your language. The default language is French. - The Welcome page appears. Click Next.
- The License Agreement page appears. Select I accept and click Next.
- Read the warnings on the Information page and click Next.
- On the Setup page, select your installation directory and click Next.
The default installation directory is:C:\Program Files\EasyPHP 2.0b1 - Select a Start Menu folder and click Next.
The default Start menu folder is:EasyPHP 2.0b1 - On the Ready to Install page, verify your installation information and click Install.
Easy PHP will install all the necessary files to your PC. - After all files are installed, the Complete page appears. Click Finish.
You may be prompted to restart your PC (Win 98 and earlier, only). - To start EasyPHP, select Start > Program Files > EasyPHP > EasyPHP.
EasyPHP will start. The EasyPHP logo should appear in the notification area of your task bar.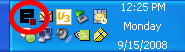
The EasyPHP status window appears. Verify that both Apache and MySQL are running.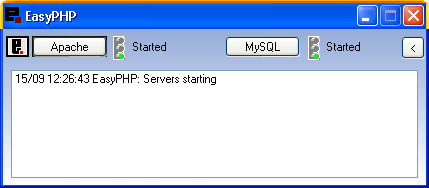
If the window does not appear, double-click the EasyPHP icon in the task bar.
To have EasyPHP start automatically when your PC boots, right-click the EasyPHP logo in the task bar and select Configuration > EasyPHP.
Note: For more information, http://www.canowhoopass.com/guides/easyphp/ is an excellent guide on installation of EasyPHP.
Step 3: Create a database for Tiki
- Open a web browser to: http://127.0.0.1/home/mysql/. The default phpMyAdmin page appears.
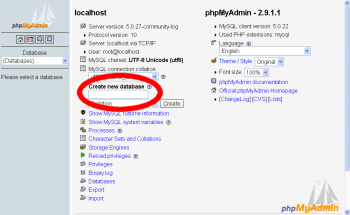
- In the field Create new database type tiki (or some other name) and click Create.
This is the name of your MySQL database that Tiki will use. Write down the name of this database — you will need it later. - Click Create.
phpMyAdmin creates the database and displays the message: Database tiki has been created
Step 4: Create a MySQL user
- Point your browser to http://127.0.0.1/home/mysql/
- Click Privileges.
- Click Add a new User.
This will create a new database user — this is not a Tiki user. - On the Add a New User page, complete the Login information:
- User name: Enter tikiadmin or another name if you wish.
- Host: Leave this field as the default. If you encounter problems, try using localhost or 127.0.0.1 instead.
- Password: Put a safe password here, you will need it later.
- Re-type: Re-enter the password.
Write down the user name and password — you will need them later. - In the Global Privileges area, click Check All.
- Click Go to create the database user.
MySQL creates the database user and displays the message:
You have added a new user.
Step 5: Reload MySQL
- Note: This step MIGHT be optional.
- Always remember to do this step when you make changes to the database.
- point your browser to: http://127.0.0.1/mysql/
click Reload MySQL
Step 6: Decompress Tiki files
- Uncompress the Tiki file that you downloaded. Uncompress the files into:
C:\Program Files\EasyPHP\www\tiki
Note: Be sure to uncompress the files into a tiki directory — not directly in the www directory. - Verify that the following file exists:
C:\Program Files\EasyPHP\www\tiki\tiki-index.php
Step 7: Run the install script
- Point your browser to: http://127.0.0.1/tiki/tiki-install.php
You can then just follow the script's instructions or follow the rest of this step. - Fill the informations :
- Click Submit Query.
If your browser offers to "remember values" say no. - Choose the profile that will determine initial settings. BasicEnabled is recommended for quick testing but you may want Default instead. Detailed descriptions can be read using the link.
- Click create.
You should see Your database has been configured and Tiki is ready to run, if this is your first install your admin password is 'admin'. - Click Login as the administrator and lock installer (Recommended) (Note: in previous versions of Tiki, it said: Click here to remove the install script and proceed into tiki).
You should finally enter the Tiki interface and see Permission denied you cannot view this page.
If you get a timeout error, you need to change your php.ini to (: max_execution_time = 120) and restart Apache. The first time a page is called, Tiki generates a template. The next time, the page is generated much faster.
If you get a timeout error,
[+]
If you get a Parse error: (...) templates_c\preferences.php on line 94
[+]
Possible bug if you install at C:\Program Files\EasyPHP\www\ instead of C:\Program Files\EasyPHP\www\tiki
[+]Step 8: Log in for the first time
Log in using the login box in the right-hand column.
You will get an permission error (you cannot view the request page, or something similar). Ignore this and log in using the login box in the right-hand column. Use the following information:
- Enter those informations :
- user: Enter admin.
- pass: Enter admin.
- Click login.
Step 9: Change default password
- new password: (use a secure password)
Step 10: Congrats!!!
It is recommended to create a new user and give him/her admin privileges instead of regularly using the admin account. You can now explore the interface but you should check the extra steps before to get you started.
Step 11: Initial setup/configuration
Please visit Initial Configuration
- EasyPHP
http://www.easyphp.org- Download EasyPHP (8-11 MB)
http://easyphp.org/download.php
http://sourceforge.net/project/showfiles.php?group_id=14045
- Download EasyPHP (8-11 MB)
- Download Tiki (6-10 MB)
http://doc.tikiwiki.org/download - Decompression utilities
- 7-Zip (Open Source, 41 languages, recommended)
http://www.7-zip.org - WinZip (Free evaluation version available)
http://www.winzip.com - PowerArchiver
http://www.powerarchiver.com
- 7-Zip (Open Source, 41 languages, recommended)